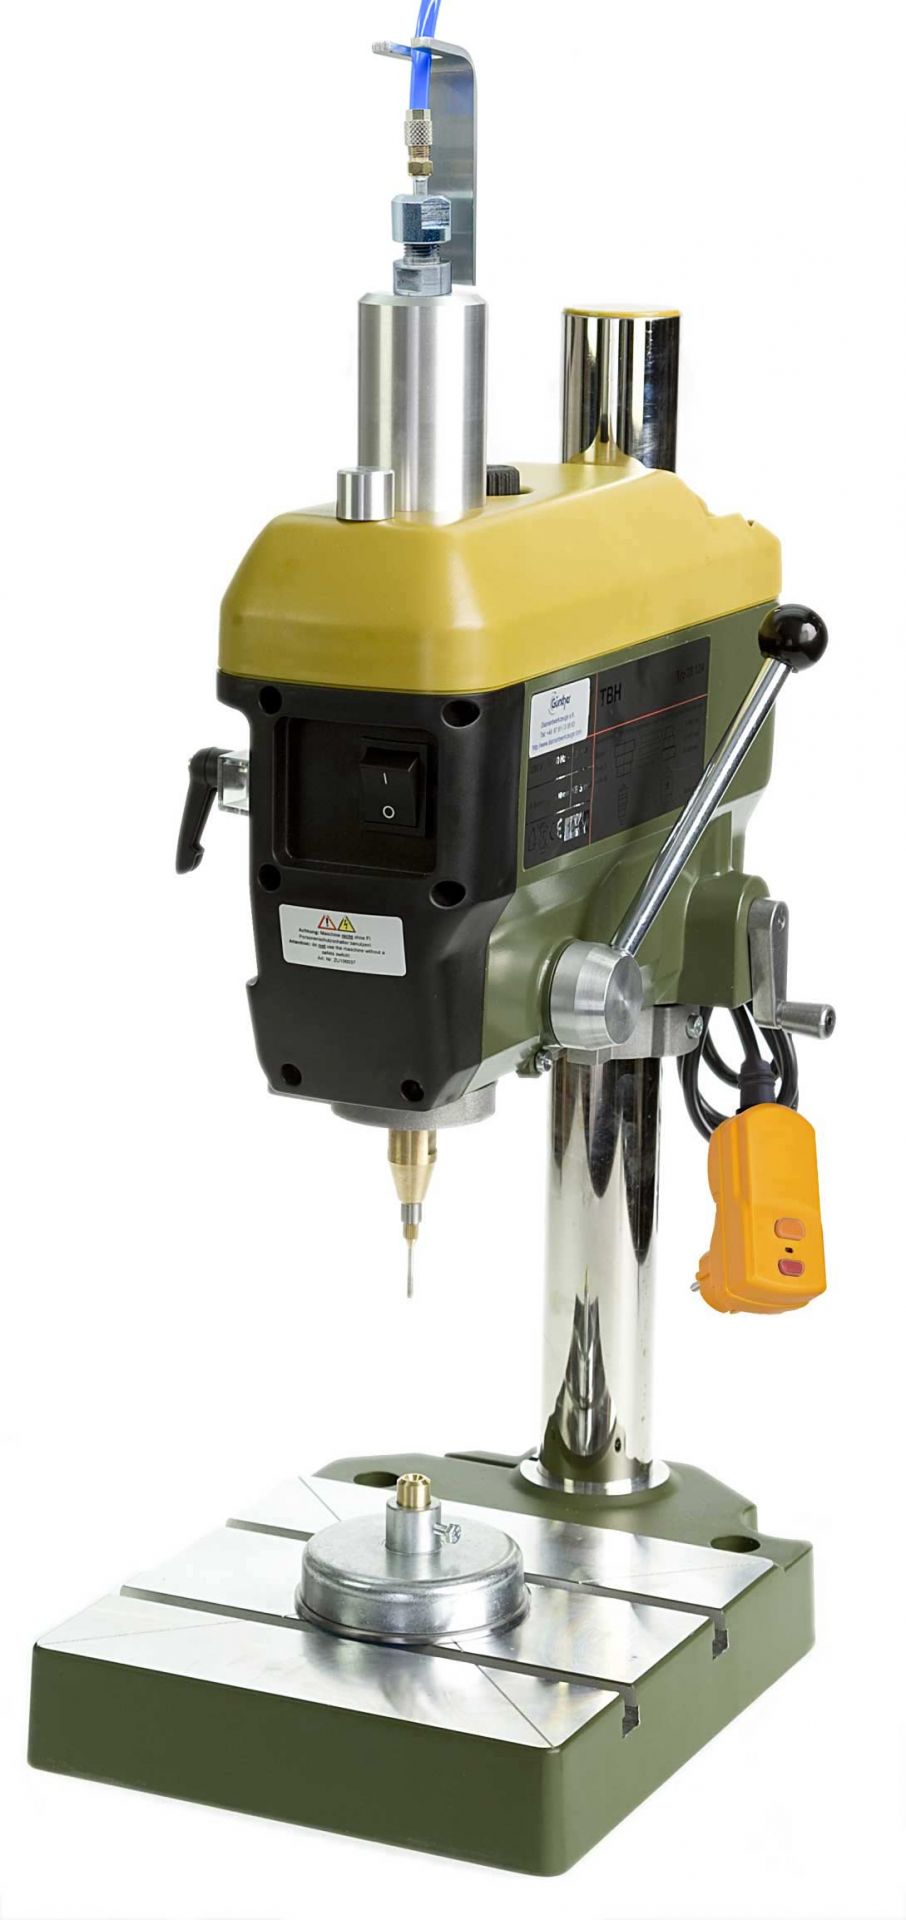
Gunther TBH Pro II & 3 Drilling System Set Up And Operation

Congratulations on your purchase of the Gunther TBH Pro II and 3 professional drilling machine. You now own the industry's best water-fed tool for drilling holes in glass, quartz, ceramics, precious stones, and solid carbide using hollow diamond drills. These instructions will help you get set up and on your way to drilling with this fantastic system.
The drill has a powerful 220v - 240v permanent magnet motor and a spindle drive using a triple pulley with a poly-V belt. This pulley system brings the significant advantage of almost six times the torque in the lower speed range (for large drilling diameter holes).
The adjustable quill feed is perfect for sensitive work. Combing the practical drilling depth display and adjustable stop, you have a precision-mounted drill spindle with excellent tolerances for precise work.
Most importantly, your system has a water feed that flows through the drill press and the center of the core drill bit. In this system, the water feed serves multiple functions:
- It reduces dust that can be harmful to breathe.
- It manages the temperature of your drill bit and the object you are drilling.
- The water feed flows through the center of the core drill bit under pressure so that you are continually ejecting the cut material from the hole and not just grinding it up into a slurry that will clog your drill bit.
Before we get started, here are some general safety considerations:
- You are combining water and electricity, so caution should always be observed. The TBH Pro II system is built with government-approved safety features like GFCI circuit breakers. Do not let the plugs, transformer, or drill press motor and electronic get wet.
- To protect your surroundings from water splashes, you should place the machine in a splash guard or area that can handle spray.
- It is advisable to wear a water-repellent apron.
- Wear personal protective equipment like eyewear and a respirator.
Some essential tools you will need for your setup and general operation include:
- Allen wrench set in metric sizes
- Flathead screwdriver
- Small channel lock pliers
- Two 17mm wrenches
- Plastic or leather mallet
- Small metal file
Let's set up your machine! We assume that you have unboxed all the components and are near a 110v power source and water source.
If you have questions or run into problems, don't hesitate to call.
Call (520) 314-9809
Step 1: Powering Your Drill Press
The power grid in Europe is different than the US. It uses a 240-volt system instead of the 115-volts used here in the US. The TBH Pro II Drill Press is made for the European 240v grid, so we must convert US power to match the system's requirements. Your kit includes a 115v-to-240v power transformer that needs to make this conversion. Here are the steps to set it up:
- Input Voltage Setting - The transformer has a red switch on the back that determines what voltage is coming into the system. Confirm that it is set to 115V.
- Plug the transformer box into the wall outlet.
- Find the location of the on/off switch on the transformer. Confirm the green light turns on when the switch is ON.
- Now turn it to the OFF position.
- Plug the sizeable Yellow Plug connected to the Drill Press into the transformer and turn ON the transformer.
- The yellow plug has a GFCI breaker with yellow and red buttons. Push the top yellow button to engage the breaker.
- Finally, turn on the drill press at the main power switch on the front faceplate. Your machine should turn on and start spinning.
- Turn off the power at the drill press and the transformer and move to Step 2
- The GFCI breaker on the yellow plug will turn off whenever you turn off your transformer. To turn it back on, repeat step 6.
Step 2: Attach The Water Hose To The Water Pipe
The water pipe is the long slender pipe that connects to your water source and provides coolant to the drill press. It also functions as a critical component of the core ejector system and needs to be set at the proper height for your press to work correctly.
The first step is to attach the blue water hose to the water pipe. Note that it can stay connected most of the time, so this step only needs to be done on your initial setup. Here's how

- Unscrew the small union nut
- Guide the hose through the nut
- Push the hose on the metal barb on the pipe
- Fasten it down with the union nut
Set the water pipe aside and move to Step 3
Step 3: Attach the Water Hose To a Water Supply
Your system includes a connection for a standard garden hose or hose bib. Attach this connector to the other side of the blue hose with the same process as the water pipe. Here's how

- Unscrew the small union nut
- Guide the hose through the nut
- Push the hose on the metal barb on the pipe
- Fasten it down with the union nut
The recommended water pressure should be at least 3.5 bar (typical house connection) to flush the drilling mud out of the hole you're drilling.
If you do not have a nearby water source, you can use a standard Garden Sprayer Tank. These small portable tanks generate enough pressure to flush debris from the drill bit and hole and are a great alternative. Check out our Sprayer Tank for sale on the accessors page. Or, you can make your own from components found at a hardware store.
Once your water supply is connected, move to Step 4.
Step 4: Grease the Sealing Rings
Your drill press uses a series of gaskets to prevent water from going where it shouldn't. These gaskets require regular greasing to avoid wear and tear and eventual failure.
*Special Note: If you see water coming from your drill press where it shouldn't, you likely have a bad gasket that needs to be replaced. If this happens, stop drilling, turn off the power, and call us at (520) 314-9809
Two places have to be greased regularly for the long life of your gaskets:
- Drill Spindle
- Water Pipe
*Important: Only use the enclosed or equivalent water-resistant grease
Greasing The Drill Spindle
The drill spindle is the cylinder that runs through the drill press head and spins when the press is on. It is hollow so that the water coolant can flow through the spindle and drill bit. This brass-colored metal pipe is located under the yellow

- Open the cover by loosening the screw plugs 1 and 2.
- Lift the cover off to expose the top of the spindle
- Two blue Simmerrings (gaskets) are located on the spindle at the top, but only the top one is visible. There is a snap ring that holds it in place.
- Wipe away any old grease
- Using the syringe, apply a small amount of grease to the blue gasket and spread it around and in with a cotton swab or paper towel. Avoid globs and wipe away excess.
- Replace the yellow cover and tighten the cover screws.
- Repeat this process regularly, such as every few weeks, but more frequently with heavy use.
Grease the Water Pipe
The water pipe from Step 2 needs regular greasing because the gaskets in the drilling spindle spin around the pipe while operating the press. If they are not greased, the gaskets can overheat and fail, causing water to flood into the drill press head. We recommend greasing the water pipe at the beginning of every drilling session. Here's how

- Using a rag or paper towel, wipe off any old grease from the water pipe.
- Apply new grease from the syringe on the upper 2/3rds of the pipe in small dollops.
- Using a rag or towel, spread the grease evenly along the pipe.
- Avoid getting grease near the terminal end of the pipe. Do not clog the water holes with grease.
- Wipe off any possible grease from the brass cap at the terminal end of the pipe. A buildup of grease on this cap can cause the ejector needle to stick to the water pipe while in the drill press.
- Now insert the water rod through the nut on the silver cylinder on the yellow cover of the press. This nut engages a collet that locks the water pipe in position when tightened and is critical for the core ejector system.
- Do not tighten the nut yet.
Move to Step 5
Step 5: Attach the Drill Bit and Ejector Needle
Our drill bits have two parts: 1) the sintered Diamond Drill bit and 2) the ejector needle. A new drill bit will always come with a new ejector needle.
needle. A new drill bit will always come with a new ejector needle.
Drill bits are soldered into a type "F" connection with threads at the rear end. The ejector is inserted into the holder from behin and should protrude approximately—1 mm over the drill's cutting edge.
The drill bit is screwed into the machine with the ejector needle and tightened hand-tight or slightly with pliers. (images similar)
First, hand tighten the drill bit, and then if needed, a slight 1/8 or less turn with pliers is sufficient. Do not over-tighten the drill bit. The threading on the drill bit can be stripped, making it no longer usable.
Move to Step 6
Step 6: Set The Water Pipe Into Position
The water pipe pushes the ejector needle out through the drill bit to clear it from clogs and debris when set correctly. It is essential to put it to the correct height to eject adequately.
If the drill press clogs frequently, check that the water pipe is set to the proper height.
Now that you have your drill bit and ejector needle installed:
Push the water pipe down until you feel and hear it touch something.
That something is the ejector needle. While pushing down on the water pipe, tighten the union nut on the water pipe slightly with a 17mm wrench. This nut engages a collet that locks the water pipe in position.
The water pipe should touch the ejector needle when the drilling lever (quill lever) is upright and resting. When you start drilling and pulling the lever toward you, space is created between the ejector and the water pipe. If you return the lever to the upright position, the space is closed, and the ejector needle pushes against the water pipe and forces the core or clog out of the drill bit.
Important: Alway remember to tighten the nut that locks the water pipe into position. Failure to do so can result in the water pipe backing out and flooding the drill press with water. Please get in touch with us if this happens.
Call (520) 314-9809
Important: The water pipe and gaskets are cooled by the water that flows through them. To avoid damage to the water rod and Simmerrings, NEVER operate the drill without water.
You must remove the water pipe for dry drilling,
Move to Step 7
Step 7: Set The Flooding Stop (only for machines purchased after March 2022)
We have improved the water pipe locking mechanism to include a flooding stop to prevent flooding. This improvement only pertains to machines purchased after March 2022. See the attached picture. To set the flooding stop

- Slide the Flooding Stop (4) over the Water Rod (2), as shown in the image
- Note that the hose (1) runs through the middle of the flooding stop.
- Now lock the flooding stop with the fastening knob (5).
Move to Step 8
Step 8: Set The Height of The Drill Press Head
When you increase the distance from the drill press motor to the end of the drill bit, you lose precision and increase vibration and runout.
Therefore, it is essential to minimize the length of pull of the drilling lever. To do this, you must lower the drill press head so that the end of the drill bit is just above the top of the stone you are drilling when the lever is upright. This position will minimize the length of pull on the lever and keep the quill travel as short as possible. Here is how to adjust the height

- The clamping levers for height adjustment are located on the side of the machine.
- Levers 1, 2, and 3 must be loosened for rough adjustment.
- For fine adjustment, levers 1 and 2 must be open, and lever 3 must be tightened.
- Now the fine adjustment can be made with the crank 4.
-
Levers 1 and 2 must be tightened again to secure the drill

Important: You must hold the drill press head up when loosening all three clamping levers. The drill press head will fall and damage your drill bit if you are not holding it up.
Move to Step 9
Step 9: Align The Counterpart
The counterpart is the bottom post of the Gunther Alignment System. This system allows you to drill from both sides of the stone but still meet in the middle for a straight hole. This system aims to prevent "blow-out," or the chip that results on the backside of the stone when you drill through from one side.


You don't have to use this system, but we recommend its use if you plan to drill through a stone. Here is how you set it up
- Select the counter that is the same diameter as your drill bit. The diameter of the counterparts must correspond to the diameter of the drill.
- The counterparts are threaded into the metal insert of the magnetic base and lightly tightened with pliers. Do not overtighten as you can strip the threads.
- The counterpart must be aligned precisely opposite the diamond drill. This alignment is achieved by positioning
- To avoid the drill bit hitting the counterpart, we set the drill stop to zero
- As an aid, use either a piece of solid paper (0.15mm thick) or a thin metal sheet. We clamp this between the counterpart and the drill and set the stop to zero.


Move to step 10
Step 10: Here we go
The machine is now ready to carry out various drilling jobs. First, turn on the water and drill press's power switch. Some water should now flow through the drill. Here are a few final thoughts to get started:
- Sharpen your drill bits regularly. Drill 2-3 times in the enclosed white sharpening stone to do this.

- Mark the location where you want the hole. Mark both sides of the hole.
- Drill a starter hole in the stone at the desired location, applying slight pressure. Do not drill your starter hole deeper than the shank length of the counterpart.
- You can now turn the stone over to center the starter hole on the counterpart. Now drill the finishing hole in the back of the stone, again under slight pressure.
- To flush out the bore, you should often move the drill up out of the borehole in a peck drilling motion to avoid jamming.
- Repeat this process until you have completely pierced the stone.
- The stop should prevent the drill from hitting the counterpart.
- We filmed this drilling process, and you can view it on our videos page.
We hope the guide has helped you get started

Feel free to watch our videos.
If you still have problems, give us a call or write to us
Call (520) 314-980